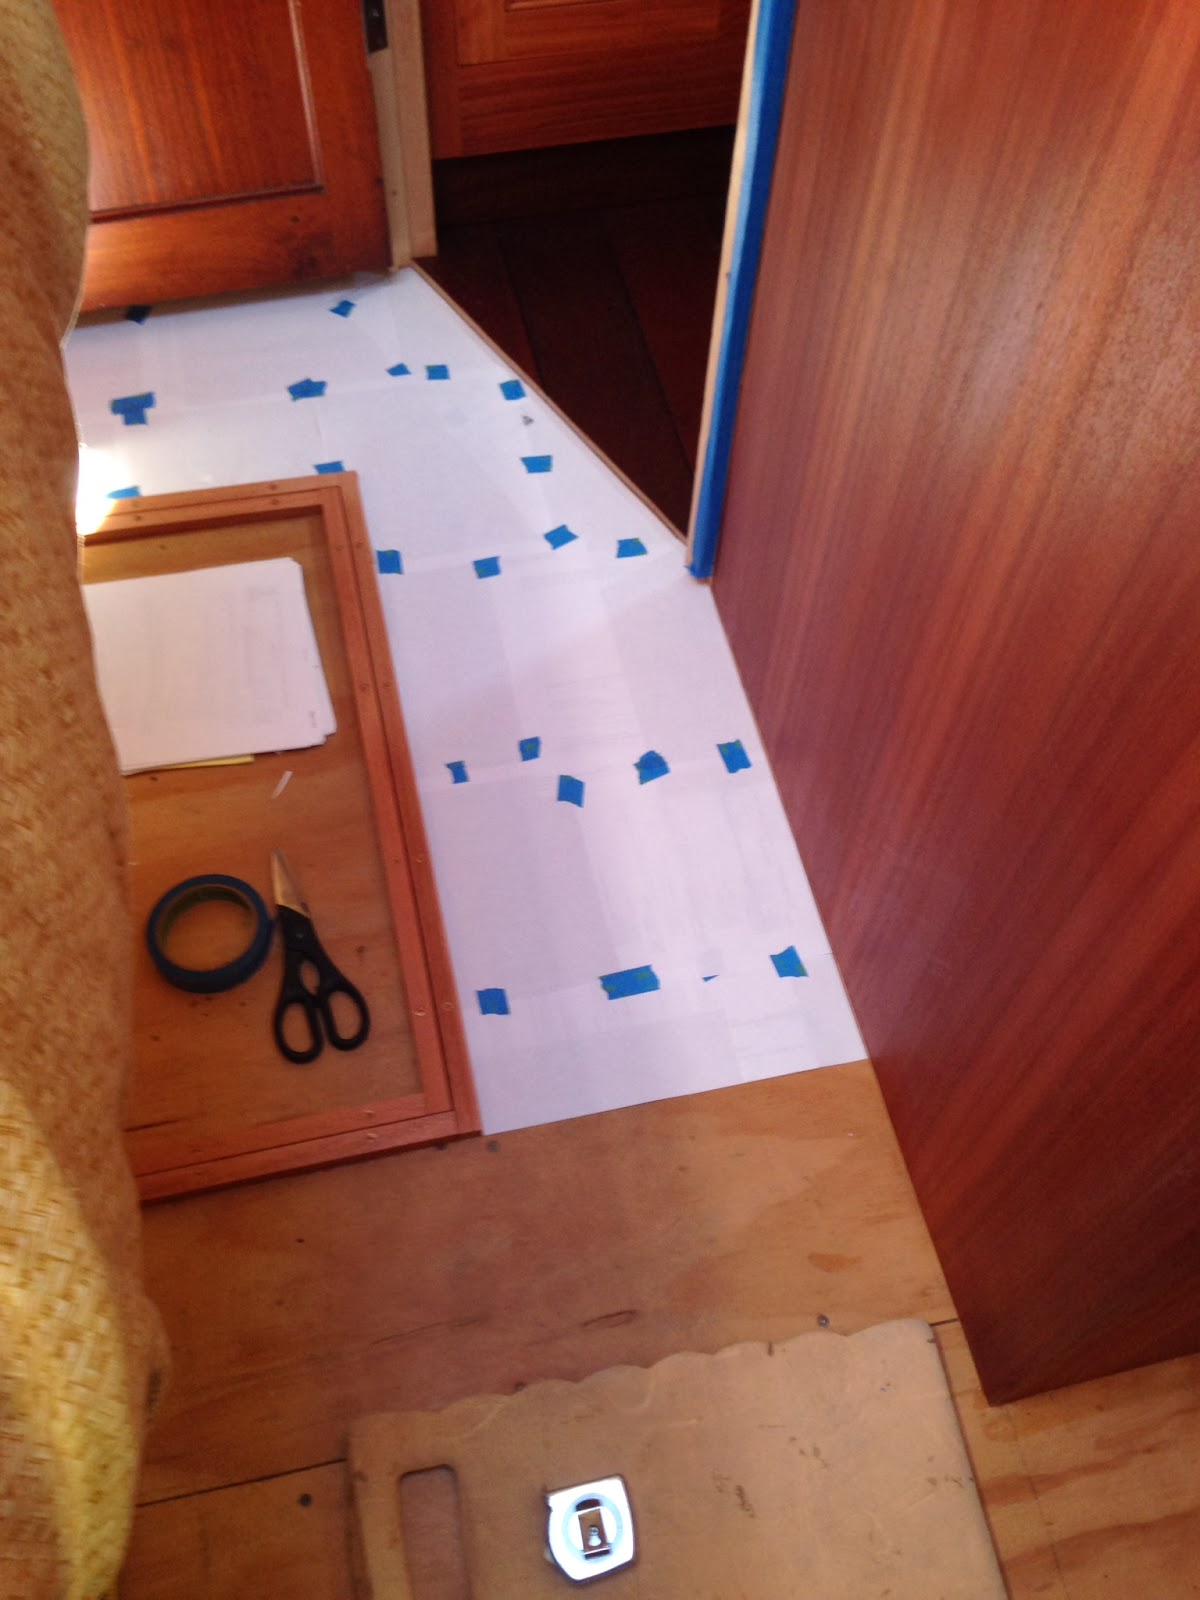
Here's some pics of last weekends project. We cut and installed all the underlay for the aft cabin carpet. We used the same high density recycled rubber mass layer that we used in the wheelhouse to dampen engine noise. In the aft cabin, I am hoping this helps to dampen the noise from the running gear and propeller that is directly underneath this space. It's about 1/2" thick, weighs 2 lbs per square foot, and glues directly to the plywood subfloor. It has already made a significant improvement in the reflected sound in the cabin and it is a noticeably more "dead" space now. Templates were again the key to getting a proper fit up the first time around. It would be very difficult to get a good fit-up of such an odd shaped space with standard roll carpet, so we are going to use commercial carpet tiles with a waterproof backing. These can be cut to shape easily (I hope) and glued down directly to the rubber underlayment. Another plus is that, with a little persuasion, we should be able to be pull up and replace individual tiles if needed. I've never worked with commercial carpet tile before, so another learning curve is on the immediate horizon. After lots of searching, we finally found an affordable area rug that we like for the forward sitting area. It looks a little green in these pictures, but it has some nice toines in it that compliment the woodwork. Like The Dude said in The Big Lebowski: "It really tied the room together".
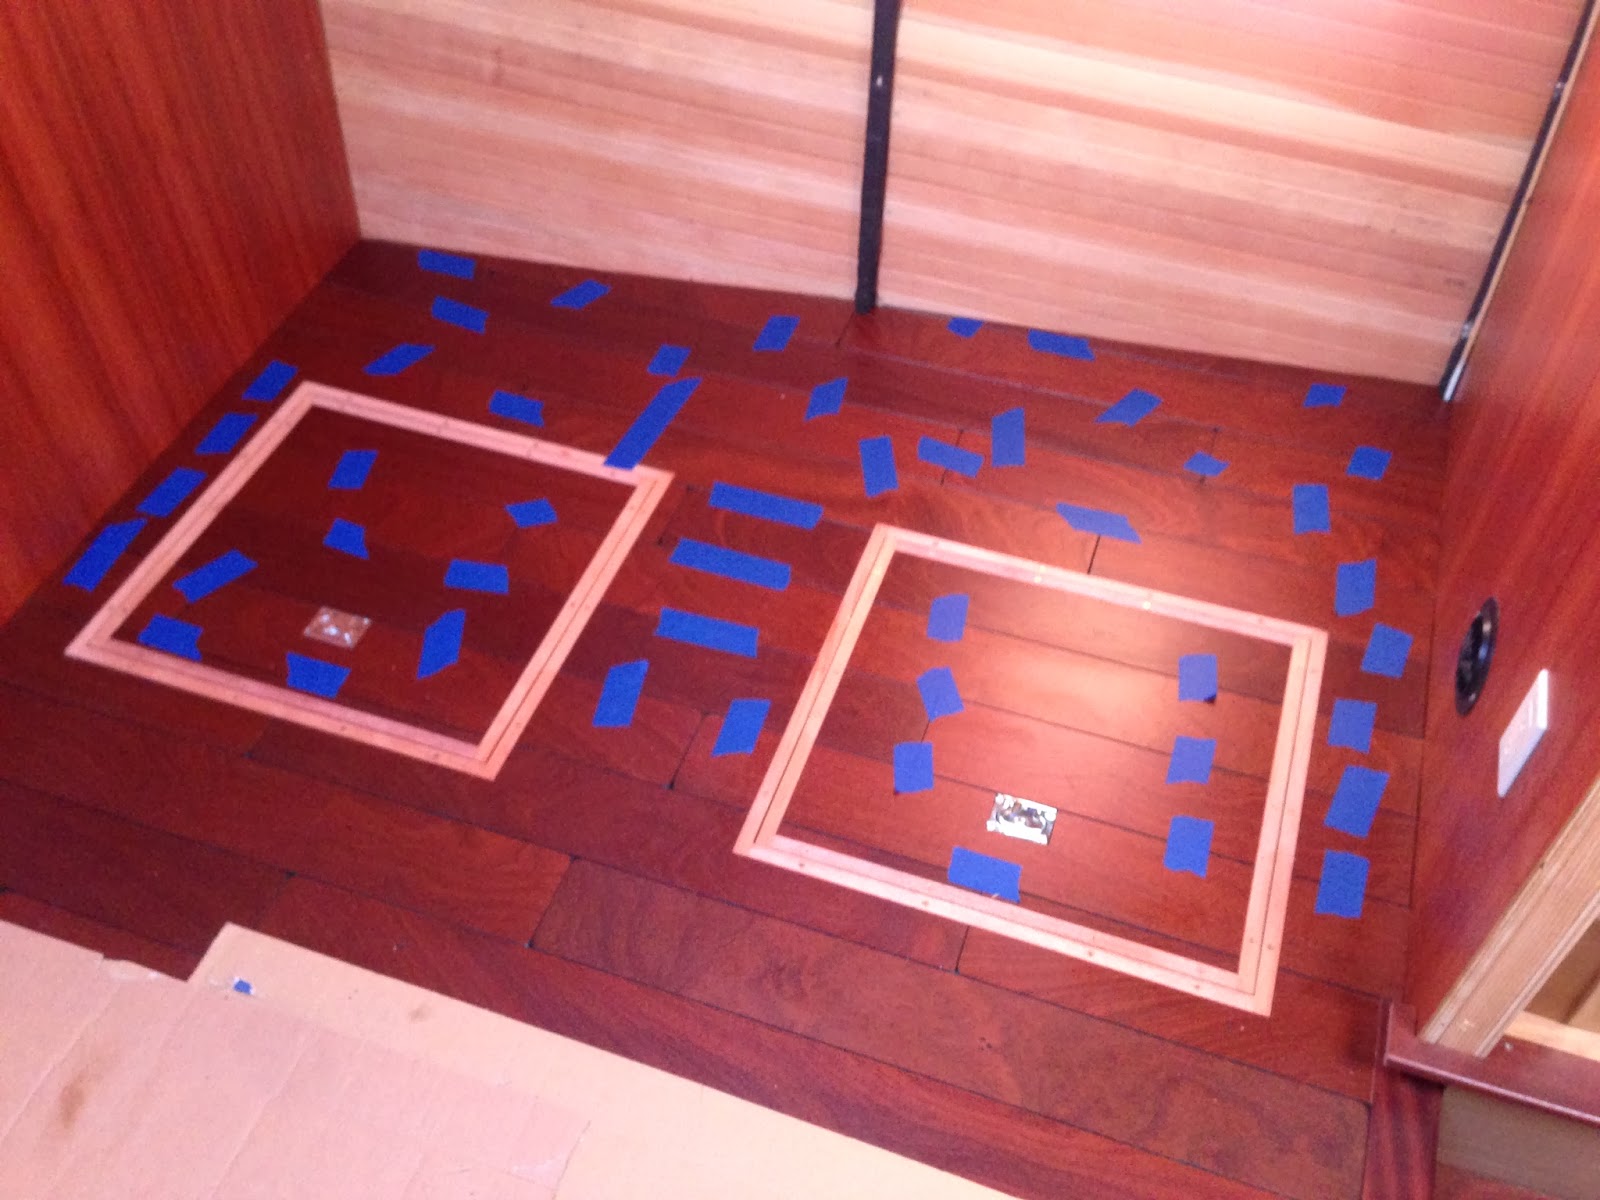
Finished up some loose ends over the last week. This included installing kick panels and modifying a couple of heater vents to fit under the cabinetry in the galley and aft head. In the aft cabin, there were a few little jobs to wrap up prior to starting on the finished floor install. One of the base cabinets had to be properly secured and screwed down in place, and there was a small section of sub floor that needed filling in near the aft starboard quarter. I also added the last bit of veneer finish to the bulkheads between the aft head and the aft cabin. The remaining exposed plywood in the aft cabin will be painted this spring when things warm up a bit and the days are a little longer. After considering lots of options for trimming out the three aft cabin deck hatches in a way that would work with the carpet in this area, I decided to trim them out in mahogany, the same as the rest of the boat. I ripped this trim to a height that will be equal to the underlayment plus the carpet. This should give us a level surface where the carpet transitions to the mahogany trim around the hatches. Kind of matches the rest of the boat too. With these little projects done, we'll be moving on to installing the underlayment and carpet in the aft cabin.
Some pictures here of last weeks project: deck finish for the forepeak. Decided on Armstrong VCT (vinyl composition tile). This is the same stuff you see in supermarkets and public buildings. Comes in 12 x 12 squares, 1/8" thick. Glues down with a special adhesive that works kind of like a one sided contact cement. You apply the adhesive to the sub-floor only with a fine 1/16" trowel then wait for it to tack up before laying down the tile and rolling it out to fix the bond to the floor. The adhesive took a long time to tack up, despite our mild dry weather this year. Even with a couple of space heaters running, it took a few hours for the glue to get dry enough to install the tile. Of course the usual fiddling around with hatches, angles, and trim made this small area a full weekend job...
Some more pictures from last week- continuing the floor planking, moving forward from the galley/dinette area. Still have a couple of minor areas to finish, but this completes most of the plank flooring that I'm going to install. Had one little mishap in the fwd head that put a small ding in the floor there, but a little red mahogany stain touch-up and it blends in pretty well with the surrounding floor. This is why we chose a slightly distressed rustic finish to start with- dings and dents blend in well with a little touch up stain. The flat finish (instead of gloss) should help hide wear and tear as well. Next week, we'll be working on the finished floor in the forepeak and the landing just aft of the forward watertight door. Haven't sourced the material yet but I'm leaning torwards VCT (vinyl composition tile). This is the stuff you see in a lot of commercial applications and in public buildings. It comes in 12x12 glue down tiles that are 1/8"thick and looks to be very durable once installed. Just have to see how slip resistant their "slip resistant finishes" really are before we go this route. The fore peak can also be accessed via a deck hatch leading up to the anchor deck. This is a good steel watertight hatch with a decent height on the hatch coaming, but the area below in the forepeak may still get wet occasionally so we need some moisture resistance here.