Sunday, June 30, 2013

Some paneling and veneer work

Here's some pics of some more plywood panels being installed. This half inch stuff and will probably be painted. The bulkhead around the engine room door was kind of tricky because of hinges and hardware. Also the door probably weighs over 400 pounds and I did not want to remove it. Still need to do some finish trim around the door, but right now, I'm just trying to make some progress getting stuff closed up. We also decided on a treatment for forward bulkheads. I still had a few nice rolls of Lyptus wood veneer, so we decided to use this to make the wainscoting. I was originally going to use vertical tongue and groove fir for this, but decided it would be too many lines (with the overhead and side shell planking already looking very linear). We'll install some nice molding between the upper, painted panels and the lower veneer panels and call it good. Should be a nice look.


Monday, June 10, 2013

Cleaning out the forepeak and some aft cabin trim

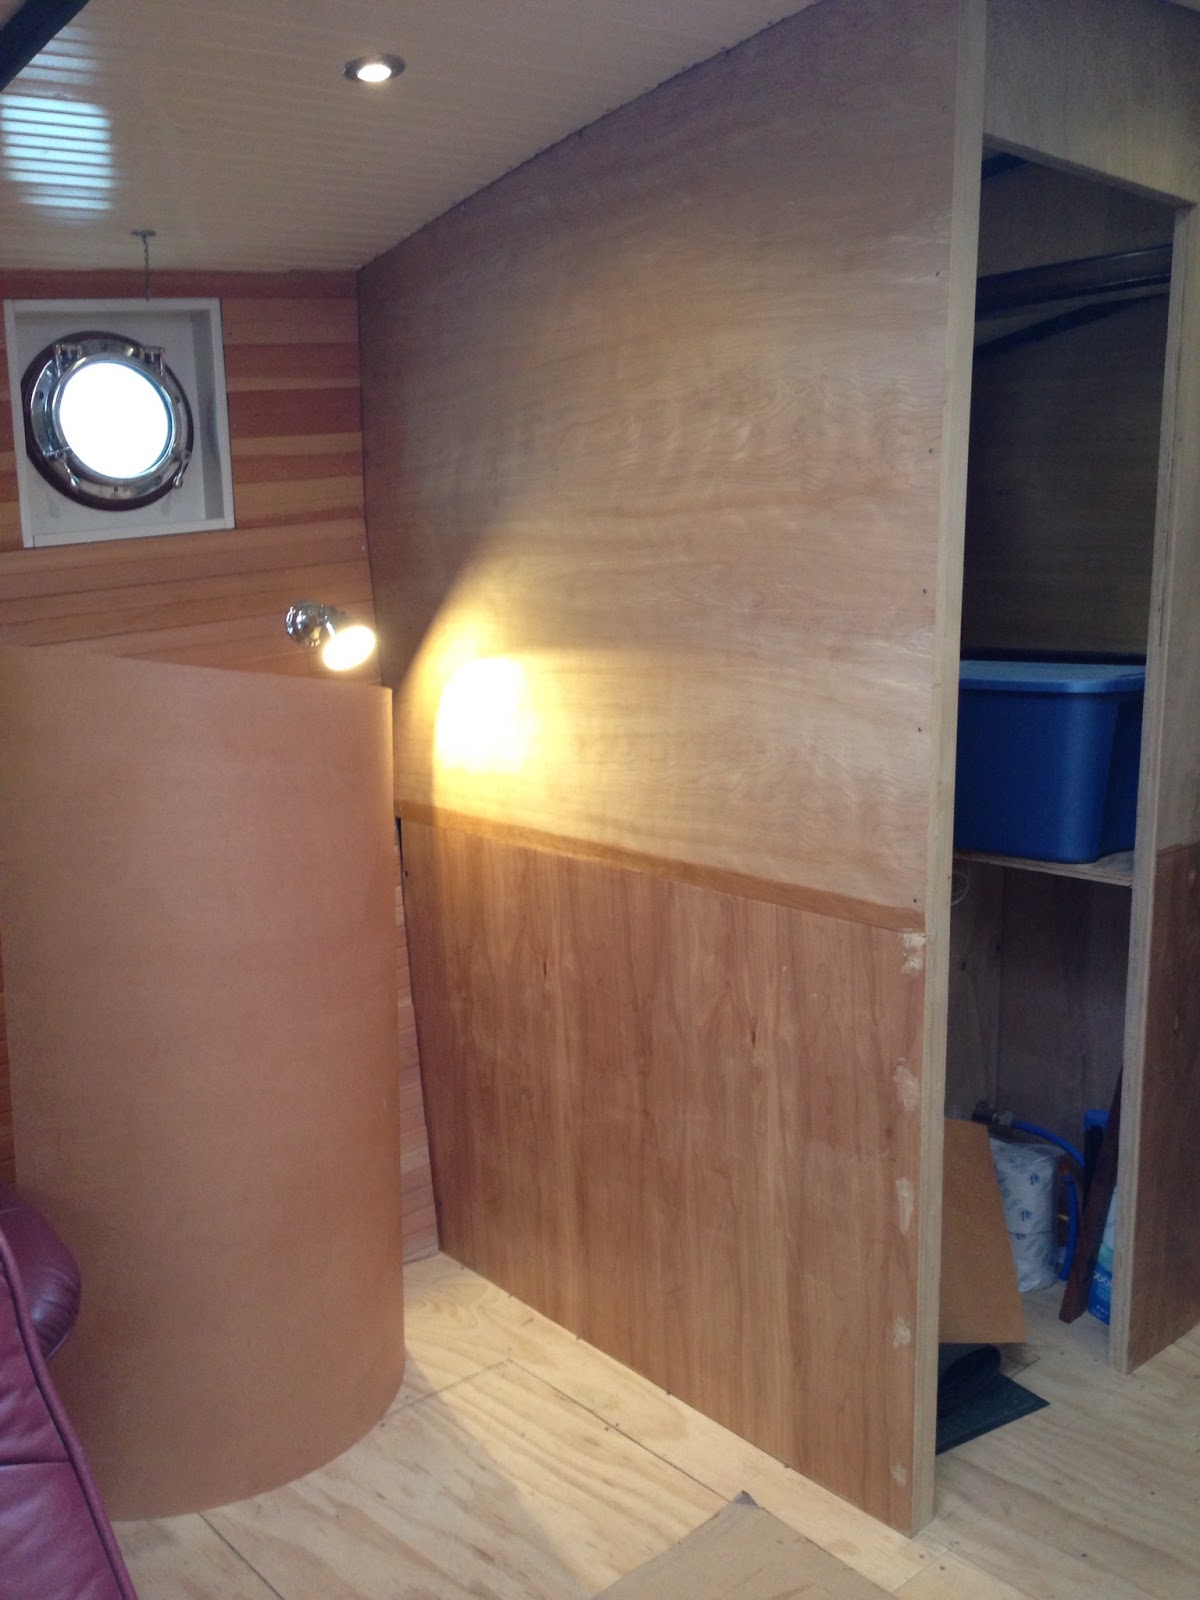
I have decided that it is time for my guitars to come home. I kind of made this a necessity by reserving a slot for myself and some old bandmates at this years Maritime Day Celebration in Sausalito this August. Must practice... We started by clearing out a years worth of misc wood cutoffs, insulation, surplus electronics, and all kinds of other boat building stuff that had been living in the forepeak. I should have taken a "before" picture, but I was too wrapped up in the clean up to pick up the camera. Trust me, it was a mess. Once the space was empty, we finished out the floor where the chine meets the side-shell, and roughed in some shelves for storage. I had to do cardboard templates for everything- lots of strange shapes and compound angles at the pointy end of the boat. The end result is lots of room for guitars and other music stuff, a place for my wife's massage table, and still space leftover. We'll have to get back in there to build a ladder to the overhead hatch and do some finish paint, but for now I'm happy with where we're at in the forepeak. Also moving along with the aft cabin cabinets. Added the trim for all the cabinet openings that I put in last week, and finished off a tricky little piece of carpentry that covers the bit of exposed transom steps near the overhead. Next up is to measure the openings for drawers and cabinet doors. Sue will be very happy when thats done. Also, for no particular reason, here's a picture of our cat sporting a stainless butterfly vent. We don't have TV so she sometimes has to fill in for our entertainment onboard.


Monday, June 3, 2013

More aft cabin cabinets

I've decided to put some attention on the cabinets and storage along the back of the boat in the aft cabin. I've been kind of dreading this job, because its another one of those spaces where nothing is square to anything else and there are a lot of challenges with transitioning from the steel hull to the wood framing and interior. To complicate things further, this is where the stairs come up through the transom to the aft deck overhead and there is the rudder post and steering gear to work around. It's kind of like building a three dimensional jigsaw puzzle from the inside out. I like the way the forward part of the stateroom (the big closet project from a couple of weeks ago) turned out so I decided to match that type of construction and finish. Instead of building face frames, I used birch ply (which will be painted) and cut all the openings needed. All the cabinet door and drawers will be the same wood and detail as the rest of the cabinetry, and will be framed in with 1x2 mahogany like sliding closet doors. The final layout that we came up with has a smaller hanging locker to starboard, then two sets of big drawers. Above the drawers, there will be cabinet doors to allow access to the steering gear and additional storage. Below there will be two removable panels to access some plumbing and heating stuff. I have transitioned to doing as much cutting, sanding, etc. outside on the dock next to our boat to reduce the amount of mess inside on "work days". Since I only have so many trips back and forth from the boat to the outside workbench in me on a given day, I have been making use of templates for all these big odd shaped pieces of ply. Not having to do multiple trips with a big piece of plywood for fit-up and adjustment is worth the extra time spent playing with the cardboard and the tape. Next job will be to frame the openings and order the doors and drawer fronts. I'm also figuring we will install cedar T&G on the back wall of the smaller hanging locker one of these days, like we did on the other one last weekend.


Sunday, June 2, 2013

Galley countertop edge

I did some preliminary work on the fidley rails that trim the exposed countertop edge in the galley. Since the counters are quartz, there is no easy way to mechanically fasten the fidley rails in place. As a trail run, I ran a 3/4" dado through some of our mahogany stock. This slips over the 3/4"x1/2" of exposed edge that I left along the front of the counters. Everything fit up nicely and I left it in place for now with a hold-coat of varnish to protect the wood. Its just press fit for now but when I get around to doing the rest of the galley trim, I'll go remove it and run a nice profile on it (probably just a quarter round on all exposed edges) and glue it in place permanently.