Monday, August 30, 2010

Engine prep and port side ports


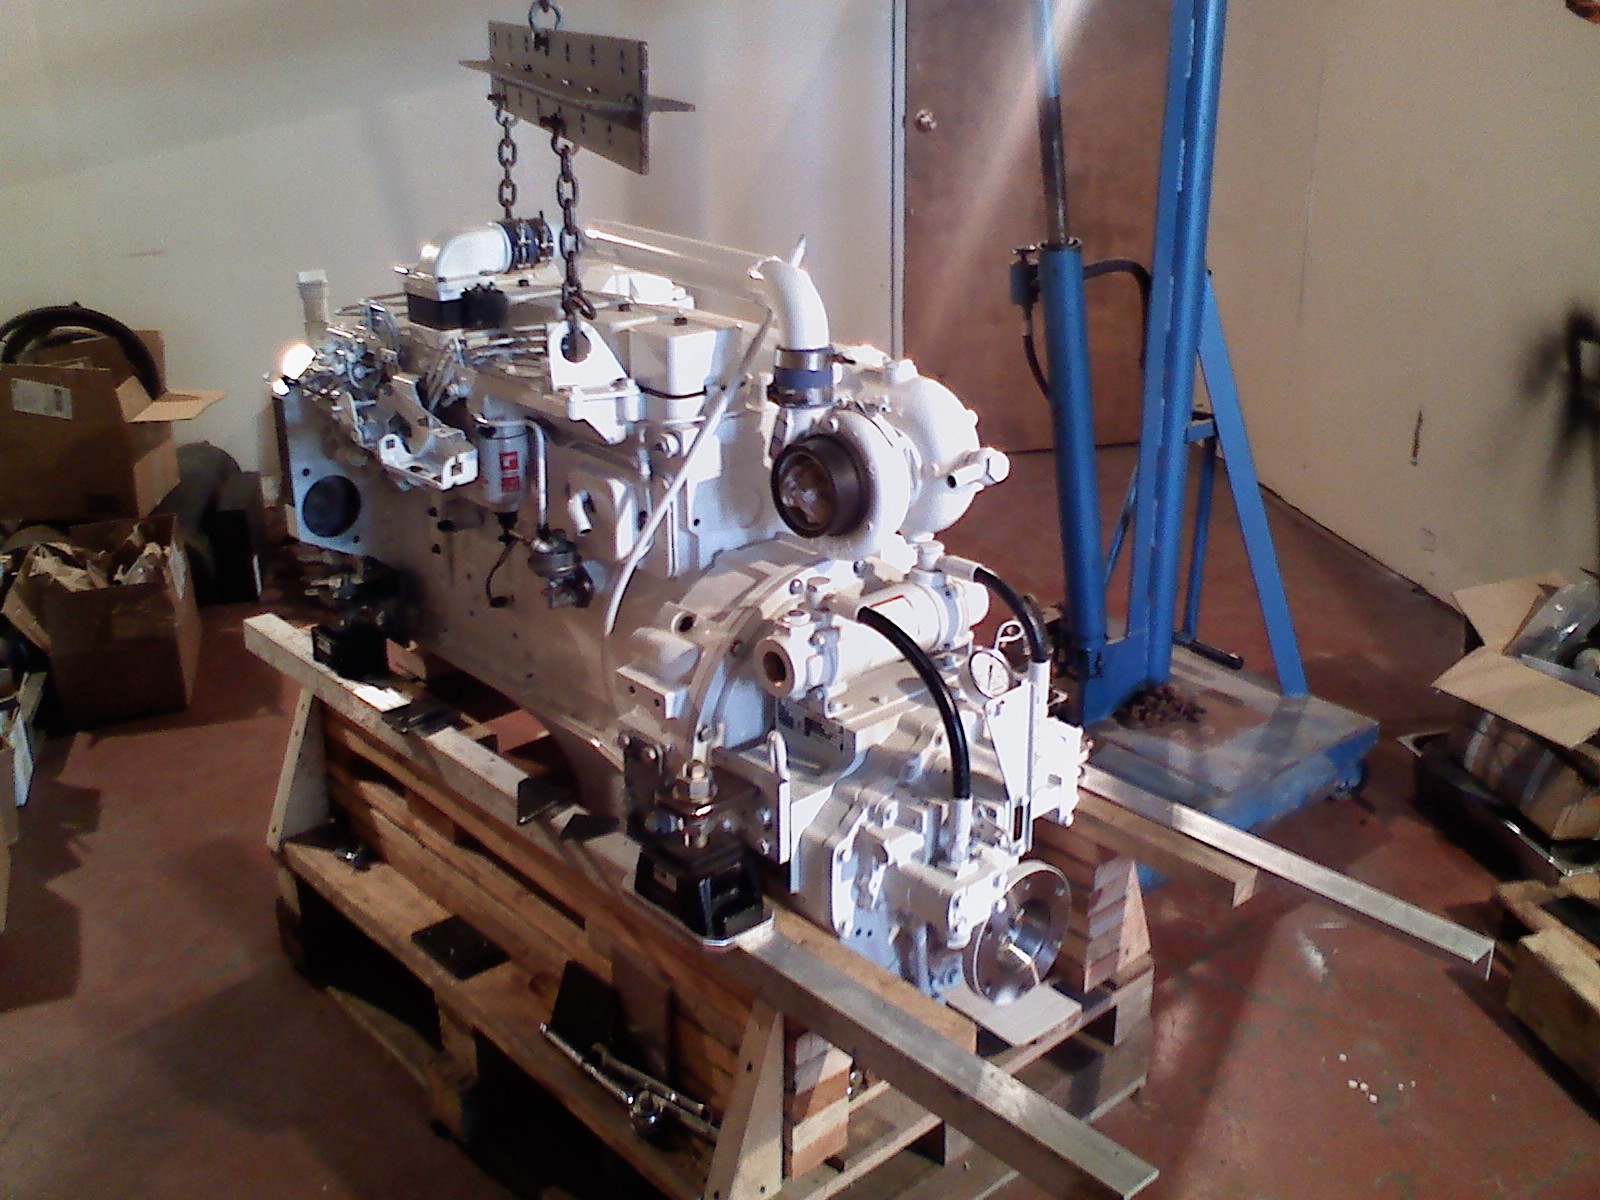
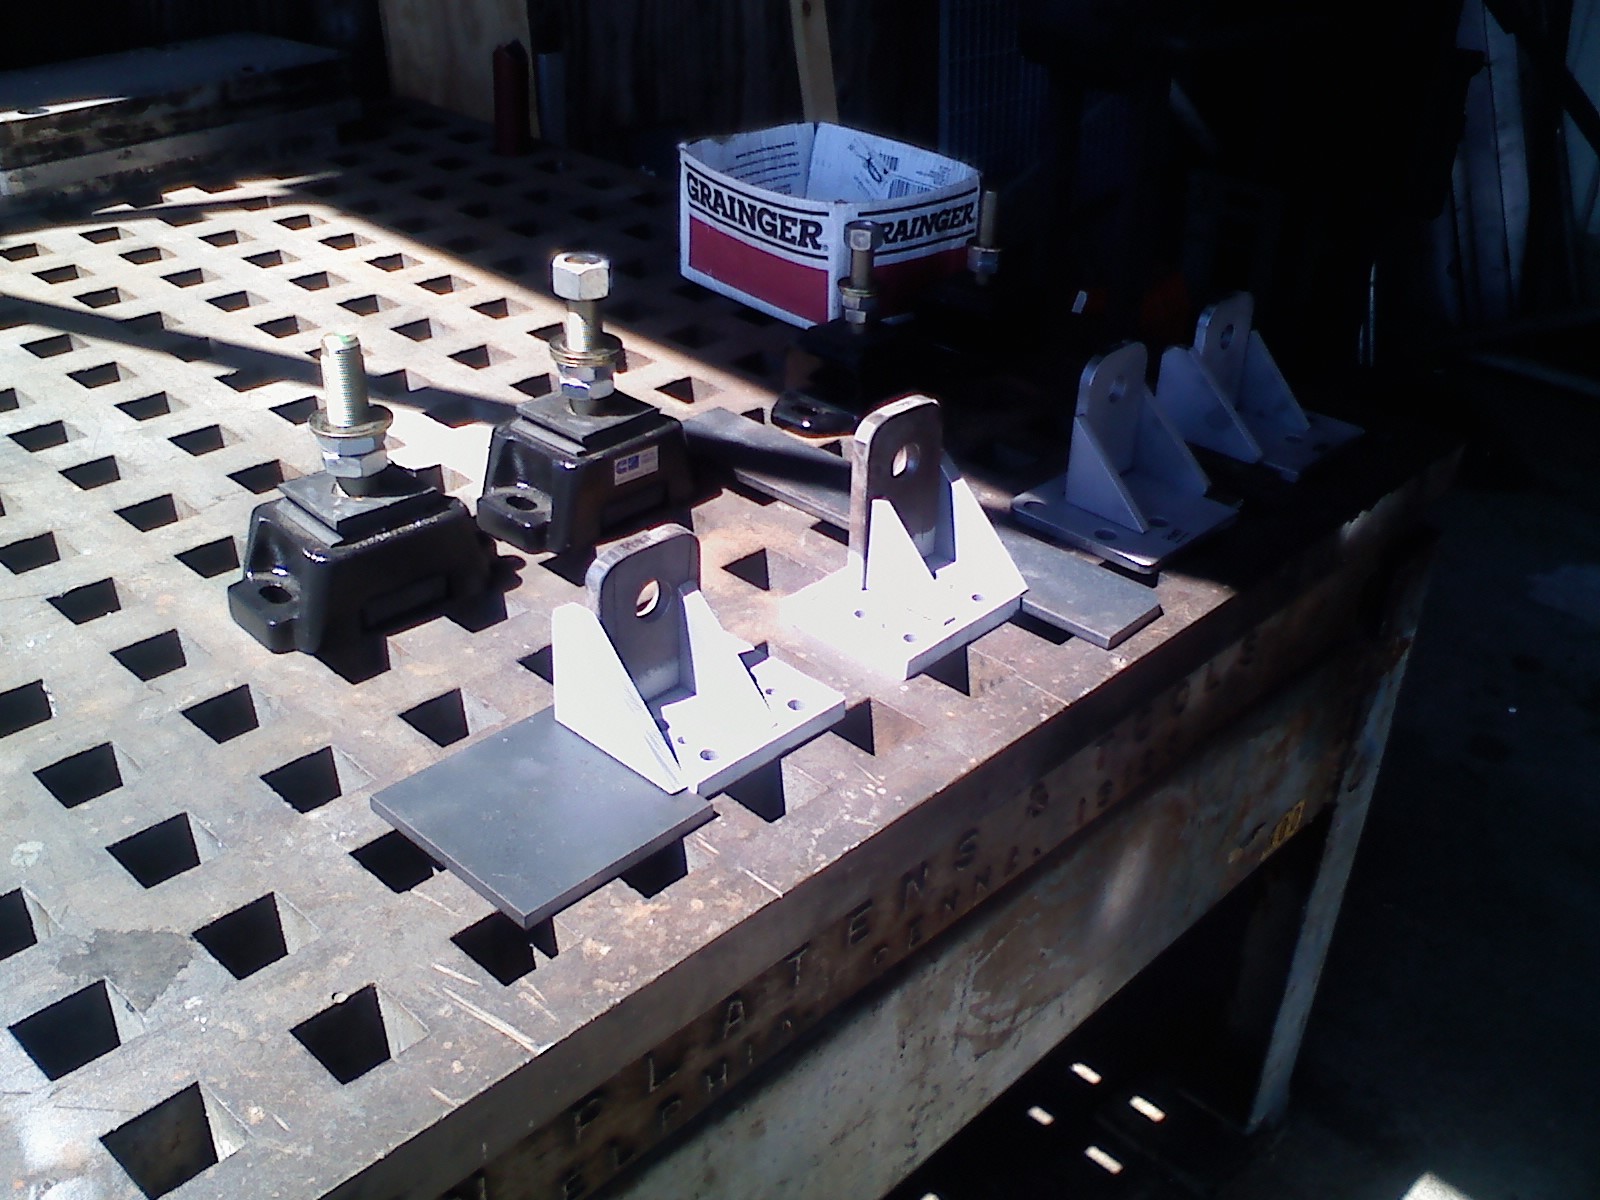
Finished prepping the engine for install. Engine mounting brackets are finished, painted , and installed. I built a lifting rig for the engine/gearbox combo that should give us plenty of maneuverability when we go to swing the engine into place We need to pick it over the aft deck, through the aft wheelhouse door, over to the the center line, and down through the wheelhouse floor into the engine room. I did a dry run with the forklift and lifting boom and it looks like all should go as planned for the install. Sue and I installed the port side port lights on Sunday. After doing the stbd side ports, the week before, we assumed that the port side would go easier... not exactly the case with this job. Don't know if the fit up wasn't as good or what, but it took quite a few more choice expletives to get the port side installed. definitely looks sharp though...

Friday, August 27, 2010

Engine mounts


Just a few shots of the fabrication that I'm doing on the engine mounting brackets. Hope we get these right the first time...

Ports


Sue and I installed all the ports on the stbd side last Sunday. They are completely bedded in the same butyl rubber caulking tape that we used for the windows and doors. These ports are made by New Found Metals and are a great value and seem to be of very good quality. The outer trim ring is threaded for the bolts that thread in from the inside so there are no visible bolts on the outside of the port. This a nice feature aesthetically and  also eliminates the potential of leaks around the bolts. The boat is really starting to look "finished" from the outside. Wish I could say the same about the inside, but we are making good progress there as well. We plan on doing the ports on the other side this weekend, then I'll be concentrating on getting the engine installed.

Monday, August 23, 2010

Wheelhouse floor


With the windows and doors installed, the first thing that I wanted to get done inside the boat was the installation of the wheelhouse sub-floor so that we wouldn't be climbing around on beams when we entered the boat through the wheelhouse door. First I installed the 2 by 3 nailers using the studs that we had welded to the sides of the steel floor supports. This is the same technique that we will use to install all of the wood nailers throughout the boat and after a little bit of a learning curve, I settled on a system for installing them that is fairly quick and easy. I also set up a drill press and a chop saw inside the boat which speeds up construction quite a bit. Once the nailers were up, we fitted up 2 layers of 3/4" plywood and fitted a soft-patch (section of deck that can be removed) for the installation of the engine into the engine room below.  

Monday, August 9, 2010

Wheelhouse Windows and Doors


Lots going on this week... we've been installing windows and doors in the wheelhouse (the forklift made for a great elevator for getting everything delivered up to the deck). Currently they are all in, though some are only being held in by a dozen or so bolts until I can get around to installing the rest of the fasteners. Everything is bedded with a butyl rubber tape that comes in a roll with a paper backing. This stuff is great. It stays pliable, adheres well to everything (but not your hands), and stays soft indefinitely. Much cleaner and easier to work with than liquid caulking compounds. You can see some of the squeeze out in some of the pictures. This trims off easily with a putty knife. Our goal is to get the boat secure and weather-tight before we install the engine. I've also begun framing in the wood nailers for the wheelhouse floor. This is what all those welded on studs are for and the system seems to work pretty well. I'm using 2 by 3 lumber for the framing/nailers and two layers of 5/8" ply for the floor. There will be a large soft-patch (a "semi-permanently secured" hatch opening) in the wheelhouse floor for lowering the engine into place. I also have begun to set up a little workshop up forward for doing our interior framing. Once we had all the doors and windows in place it became apparent rather quickly that we need a latch to keep the side door from banging around in the ever present summer-time wind up here. I found this nifty little latch at Newfound Metals (the same folks that supplied our soon to be installed stainless opening ports. It has a spring loaded rubber bumper and a nice heavy catch with a big release paddle on top. Very nicely designed and highly recommended. -PB

Thursday, August 5, 2010

Bilge Paint and Bearings


Spent a day doing our last big painting chore: painting all bilges up to the waterline with Amerlock epoxy. This is a tough, gloss finish epoxy that should hold up well in the bilges. We also used this paint in the engine room but because of all the piping and framing in there, we had to roll and brush that area. For the rest of the bilges, we set up the airless spray rig. The set up and prep took most of the day but once we got the sprayer dialed in it went very fast. We did the whole boat (5 gallons) in about an hour. There is still some detail painting to do, but the big jobs are done now. Next on the list was installing all the bearings (shaft and rudder upper and lower). The ID (inside diameter) of the schedule 120 pipe that we used for the shaft and rudder tube was pretty close to what we needed, but we had to do some "fine tuning" with a honing rig to get the pipe trued up to the exact dimension for the bearings. This is the same tool that is used for honing engine cylinders and it worked very well for this application too. I had previously drilled and tapped for set screws and all the bearings installed very nicely with a little smear of red hand epoxy to insure that they were bedded properly. With the help of a few engineers, the shaft slid into place as planned. In the engine room, I am using a dripless seal system made by Tides Marine. This is a lip seal type and has worked flawlessly for many years on our current boat. I'll install a couple of spare seals on the shaft before the flange goes on so that we can change out the seal in the water if necessary in the future.

Wednesday, August 4, 2010

Prop and rudder Install


We installed the prop and rudder last Sunday. Unfortunately I can't seem to find any pictures of the rudder going back in, but it was the same routine as last time... using chain hoists on the lifting eyes that are welded to the hull fore and aft of the rudder shaft. Once the rudder was bolted up to the flange on the rudder shaft, and the tiller arm and pintle bearing installed, I couldn't resist putting the prop on. Now it looks like she could go somewhere... We'll tighten up and secure the prop nuts once the engine is installed and everything is aligned.