Tuesday, September 22, 2015

Transom Davits

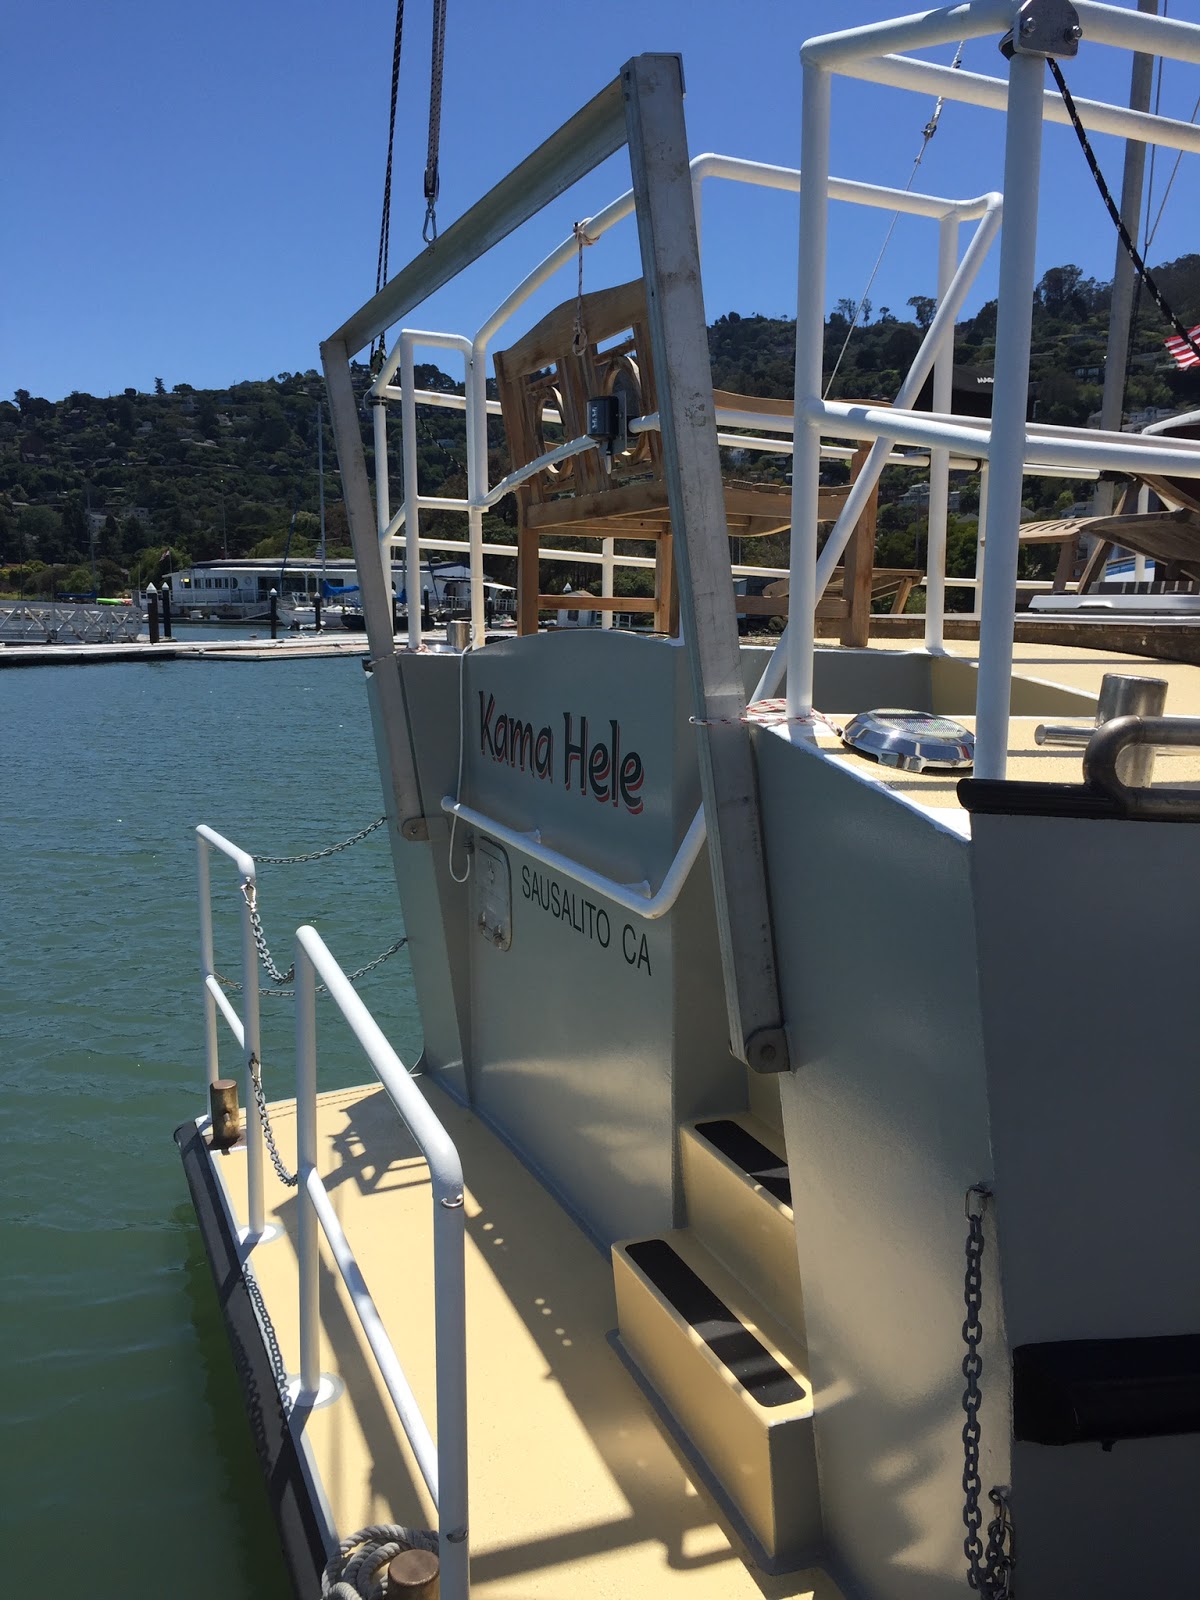
Here's some pics of fabrication of our transom davit. This design concept has been kicking around in my head since we welded on the hinge pad eyes on the transom during the construction of the hull many years ago. The geometry is such that, when in the stowed (up) position, the dinghy is carried up above the swim step with enough clearance to walk down the steps and stand on the swim step with plenty of headroom. When lowered, the davits swing the dinghy out and over the aft railing and swim step and launch it in the water behind the swim step. If everything works out right with the rigging from the davit to the dinghy, this should not require block and tackle to launch or retrieve the dinghy- just lower it into the water until its floating, then unclip the lifting harness. We'll see how that works out when we get a dinghy to work with.

The first few pictures show some of the full size mock-ups and fancy drafting I did to get the measurements and geometry dialed in:


Next up was the fabrication and welding. I made the assembly in three pieces (two davit arms, and the bolt on cross support structure). This turned out to be a good move as this thing would have been really hard to handle and install as one piece. Here's my fabrication work before handing it off for final welding:


Some more fine MIG welding Romero's Welding at Mare Island:


Installation took some acrobatics, but it went together pretty much as planned:


Raising and lowering is accomplished manually with a hand winch rated at 1000 lbs and equipped with 7x19 stainless wire rope. The winch has an automatic brake and will hold the load whenever you stop cranking up or down. I will be adding some kind of safety locking pin mechanism to each arm at some point so the davit isn't relying on the winch brake to carry the load when up in the stowed position. The boom lift can also be used as a back-up to raise and lower the whole setup in case the winch system ever fails:


I rated the entire rig for a minimum safe working load of 1000 lbs (or better).  I figure the davit assembly weighs about 150, so that leaves us plenty of capacity for a modest skiff. We will likely go with a fiberglass rowing tender. I like the more traditional look- and they can be sailed, or motored with a small outboard. The plan is to have the dinghy set up to be lashed down on the aft deck behind the wheelhouse if we are doing any major open water crossings. Otherwise I feel pretty confident that the davit system is high enough and strong enough to do the job of carrying our tender, and will make launching and retrieving very quick and easy.


Tuesday, August 18, 2015

Solar Panels

Solar panels are installed and making electricity. The past few weeks has been a crash course in solar power technology. We ended up with six Kyocera panels for a total of 840 watts. We went with Blue Sky MPPT controllers for their compact size and excellent efficiency. With solar panels, shading is the enemy as it will reduce the output of other panels that are in the same circuit. To provide some isolation (which minimizes shading on one panel from affecting the rest of the array) we wired the panels in parallel, with home runs from each panel down to the controllers. We put three panels on each controller to further isolate the effects of shading on the overall output and to provide some redundancy. Each panel is fused before the controllers and the output of each controller is fused where it meets the positive bus of the house battery bank. This was a lot of wiring and took most of a three day weekend to finish. With everything online, we have been able to pull 50 amps out of the array at 14.2 volts during the day with clear skies. It could probably go a little higher if the house batteries a little less charged up. We had to turn on a lot of electrical stuff to get the controllers to see enough demand to get the output up to 50 amps. Our target for the rooftop array was 50-60 amps max output so we are pretty close to our expectations. We have been "off the grid" for three days now, with daytime solar charging seeming to keep up with our 24 hour demands. Each afternoon, our "state of charge" for the house batteries is back up to 100%. The nice summer weather and long days have helped. We are still using the shore power for the electric element in the water heater but when cruising, our domestic hot water can be heated on demand with the diesel burner that provides our hydronic heating circuit or via the heat exchanger with the engine coolant when we are underway. Everything else is running off the 12 volt house bank (refrigeration, lights, pumps, etc.) or using the AC output of the inverter (misc appliances, home depot freezer, and some electronics) which is fed by the same house battery bank. I think that a couple of more panels (maybe on top of the aft dinghy davits when we get those built) will give us a very solid solar power set-up to meet most of our demands most of the year. A wind generator would be a nice add-on too. Of course the beauty of solar is no moving parts and little to no maintenance.


Stud Welder

In order to mount the solar panels, we decided to rent a CD (Capacitive Discharge) stud welder to create the attachment points for the solar panel brackets on the wheelhouse roof. It consists of a welding unit and a gun that holds the threaded studs and is spring loaded to "fire" the studs into the molten metal that is formed when an arc is created by the machine in the base metal. It all happens in a few milliseconds, and creates a very strong threaded attachment point on the steel deck plate. The beauty of this machine is that it welds so quickly that there is little to no heat transfer to the back of the plate that you are welding to. This means no paint burn, and no need to remove the interior panelling and insulation on the backside of the weld (we tested this first just to make sure). This saved us at least a days worth of labor removing and re-installing the interior overheads and painting the burn through, which would be required with conventional welding. The whole job (including some extra studs on the foredeck for the kayak cradle brackets) took just a few hours. We used 316 stainless and painted the weld area well with epoxy primer and top coat.


Sunday, July 19, 2015

A few new projects

We scored an excellent set of used steamer chairs on Craigslist, with cushions and a bonus bench. Spent a day cleaning them up and doing some minor repairs to the hardware. Much more comfortable that our old plastic lawn furniture. The bench was part of the package and it actually turned out to be a great addition to the back deck (with a little Skill-saw modification to the legs to fit the camber of the deck):


We pulled our old trusty kayaks out of storage and will be making some custom cradles fro them so they can live on the forward deck in front of the wheelhouse:


I've been adding some rigging to our mast for lifting and future sail control for the aft boom. In the next couple of months, we're going to be working on solar panels for the wheelhouse roof (starting with figuring out what we can fit up there), and building the aft davit system for storing and launching a dinghy: