Saturday, February 19, 2011

A Few New Projects


We finished most of the insulation in the aft cabin a few weeks ago. I had to take a little time off from insulation work to preserve my sanity. This is one of those jobs that makes our boat seem very big. For a change of pace, we have been working on a few other projects. I installed the nailers on one side of the aft cabin so we could do a test fit of the tongue and groove panelling that we are going to use. I am very happy with the results. We'll probably give it a light oil finish and top it with some satin varnish. The (faux) beams that we will use to trim the frames will likely be a darker wood like mahogany and the overhead panelling will be bead board planking, painted white. Should look pretty sharp. Another project that I finished up the fabrication for was the closures for the big dorade vents up forward. I won't bother to describe how they work other than that they are spring loaded in the open position and can be cranked down with a knob inside the cabin and made completely water tight. The pictures show it pretty well I think. I was fortunate enough to get my hands on some surplus commercial marine stuff recently for our project... first, a very heavy duty flanged exhaust silencer with SS flex couplings and some misc pipe and flanges. The spec happens to be just about right for our Cummins 6BT engine and it looks like with a little modification, we can make it work for our boat (despite the side inlet on the silencer). Second, was a batch of lightly to barely used Gel Cell batteries. We have eight 4D (180 AH each) and two 8D (225 AH each) to work with. I'm going to use the 4D batteries for the house bank. This battery bank will handle our 12 volt needs onboard, and also our AC power via an Inverter. We are currently saving up for a Victron Multi Plus inverter/charger to handle the house bank. One of the 8D batteries will be used as a starting battery for the main engine and the other 8D will be used for emergency back-up power for the wheelhouse electronics. I'll have more about the electrical plan for the boat in the coming months. So that all kept me busy for the last few weeks but now it's back to insulation... hope to get the forward cabin finished this weekend.

Thursday, February 3, 2011

Update


Been very busy with work lately. Among other things... the ferry service that I work for has started a 14 month re-fit project on two of the ferries at a shipyard in Washington, and we are also bidding on a service contract to continue being the operator of the commuter ferries that we run. Also a myriad of other smaller projects that seem to be taking up most of my free time lately. Anyway, we've been doing a few things on the boat... mostly procurement of parts and supplies and more design work on the interior and systems. Our good friend Karen helped us get started on the forward insulation and I installed the last of the tanks - two water tanks in the aft cabin, tucked up under the swim step. I found a great deal on some very nice clear douglas fir planking. It has a regular t&g pattern on one side and a nice bead board detail on the other. I'm going to use the t&g side for the cabin liner (along the inside of the hull plate) with an oil finish, and the bead board side for the overhead (painted white or off-white). It's a big pile of wood and the plan is to pre-paint/pre-stain everything in full lengths before we install it on the boat.

Saturday, January 15, 2011

A little work, A little play


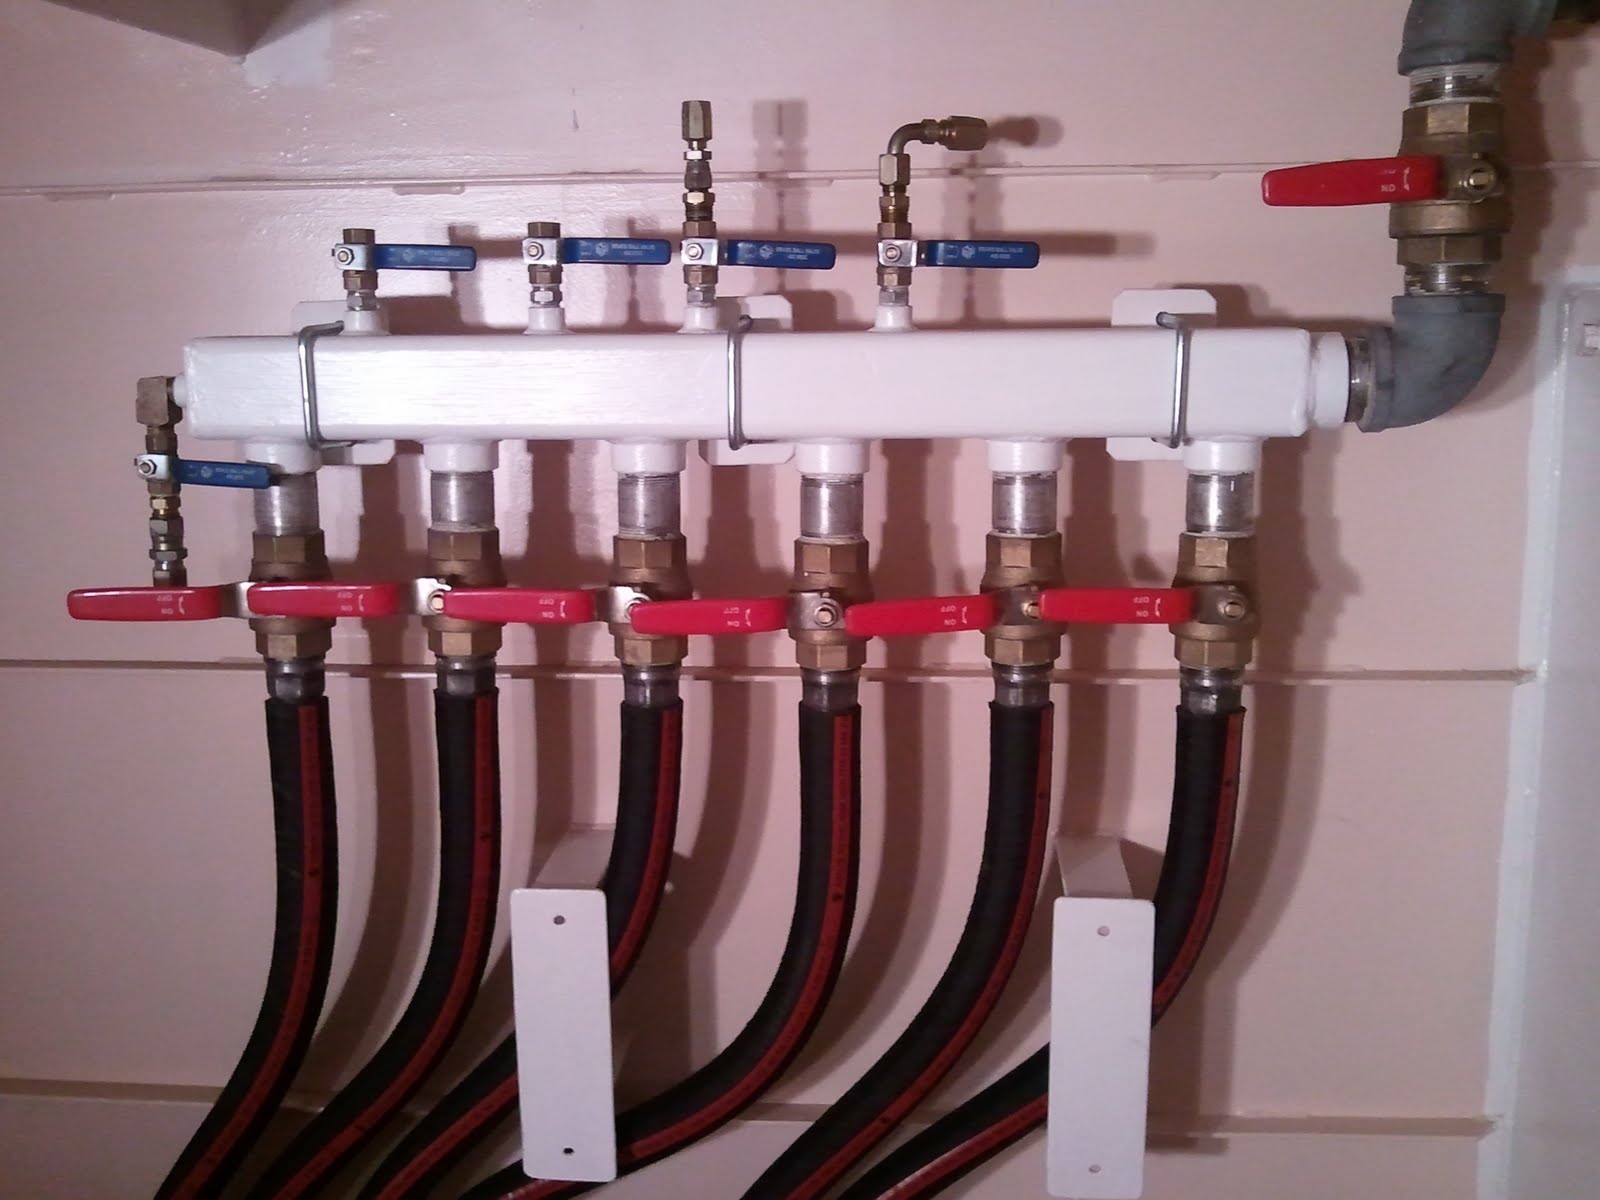
Completely unrelated to boatbuilding... had a chance to take the family to see Joe Satriani at the Fox Theatre in Oakland the other night. Satriani is one of the best players around and its always a blast to see him do his thing. At the end of the show Sammy Hagar made a guest appearance for the encore. Great show. Back to boat stuff... spent a few "after work" hours starting to plumb the fuel system. The big manifold is the tank fill distribution, fed by a single deck fill behind the wheelhouse. The 1 1/2" hoses drop to the hard piping leading to the six fuel tanks. The smaller manifold below is the supply from the six tanks. Fuel transfer pumps (electric and manual back-up) will be mounted in between the two manifolds on the bulkhead. When its all hooked up, we'll be able to transfer from any tank to the day tank, or from tank to tank as needed for trim or fuel polishing. Thanks again to Chuck for all the aeroquip fittings and the lesson on making up the hoses.

Wednesday, January 12, 2011

Aft cabin insulation finished


Well mostly... still a few little spots to finish. The difference is dramatic. We can heat the space nicely with a small electric heater and the resonance of the hull is significantly reduced so it is much quieter now. We now have the fwd part of the boat cleaned and prepped for the insulation install. Its over twice as big as the aft cabin, but now that we have developed a system for installing this stuff, it will hopefully go a little faster. Did a stove top flame test last week with a piece of scrap and this insulation is indeed self extinguishing. Nice to know.

Saturday, January 1, 2011

Insulation


Happy new year to all... 2011 finds us beginning the process of insulating our boat. In a steel boat, insulation serves three purposes: condensation control (especially important when cooking and heating the boat in colder climates), sound control (so it doesn't echo like a big oil drum inside), and keeping the interior temperature stable. After researching to death the choice of material and process to insulate our hull, we decided on Armaflex closed cell foam- 3/4" for the hull sides and overhead, 1/4" for the frames and longitudinals. This will give us an insulation "sandwich" of 3/4" Armaflex, 2" air gap, then 1/2" interior tongue and groove planking. There is no easy solution to insulating a metal hull but having spent a lot of time looking at all the alternatives, this solution made the most sense for us.  Armaflex is similar in density to neoprene except it is completely closed cell and will not absorb water. It is also manufactured with microban which is supposed to control mold and mildew. It is really nice stuff to work with- no dust or particulates from it, and very clean. It also has no smell and is relatively fire resistant and self extinguishing. The down side is the cost (it will probably be about 50% more than a professional spray foam job) and the labor to cut and fit it into all the frame spaces. It also dulls our cutters very fast so we're going through a lot of blades. We opted for the plain Armaflex instead of the self adhesive type as it allows us to control the adhesive and it is also cheaper by a factor of three over the peel and stick variety. stock sheet size is 3' x 4' which works out nicely with our 36" frame spacing. After a few days of cutting and gluing and fine tuning our installation techniques, we are starting to make some good progress although it can be very tedious cutting and fitting the foam. The best part is that once I get done cutting and installing all the bits and pieces to fit all the hundreds of odd shapes that make up the inside of our boat, I'll likely be ready to spend some time in a rubber room... which is just what we'll have at the end of this process.