


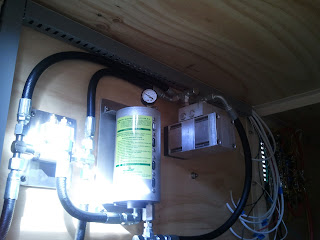


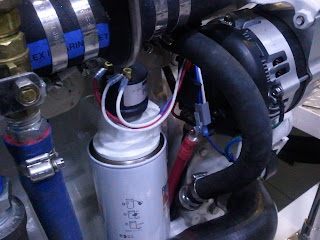


A few recent projects... After successfully test running the engine (in jury rigged form), I set about to run all the wiring between the engine and the wheelhouse, including the control/gauge panel in the engine room. This was rather involved as it also meant hooking up all the final wiring for the alternator charging system and starter battery circuit. The way we are now configured, you can start, stop, and monitor all the engine functions from either the engine room or the wheelhouse. The engine driven battery charging system consists of a high output alternator controlled by an external regulator. The regulator can be programmed for a lot of fancy features but right now we just have it configured for gel cell battery charging, slow ramp up (to avoid hard load on the engine at start-up), battery temp sensing, and alternator temp sensing. All the charging current goes from the alternator directly into the big house battery bank which basically runs the boat. The engine starting battery is used only for cranking the engine, and gets its charge from the house bank via a Duo Charge (an automatic dc-dc charger that "spills over" current from the house battery bank to charge the starter battery when it senses that house battery charging is taking place). So far everything is working as advertised. The only glitch left is the tachometer which is not working despite many checks on the wiring and ensuring the right voltage in the right places from the magnetic inductive pick-up on the flywheel. Have to do some more research on that one... As soon as we decide on a wheelhouse instrument layout, I'll be building the main helm instrument console, and hooking up all the basic wheelhouse electronics. I finished making up some neat little fuel vents out of some bell reducers with stainless rings to hold the 30/30 mesh screens in place. These are now installed on the fuel vent lines and the tanks can breath easy. Also installed a plate type heat exchanger that will transfer heat between the engine cooling circuit and the diesel furnace heating circuit. This will allow the furnace to preheat the engine for easier starting when temps are low, and allow excess engine heat (when running) to feed the heater circuit so the diesel furnace burner doesn't have to cycle on as much when we are underway and need vessel heating or domestic hot water. I rebuilt another set of used Racor fuel filters that I got my hands on. One of these will feed clean fuel to the diesel furnace and the other will be for future additions (maybe a small engine powered DC generator for additional battery charging?). Engine room is really coming together and it feels like we are on the downhill side of the machinery installation...


Wow! I just discovered your site and want to complement you on all the work you've done both on the boat and the website. This is really very informative. I worked on Mare Island (many years ago) I had always wondered if anyone would take advantage of the facilities to build a boat. The reason I commented here is that I couldn't help noticing what appears to be a cam and groove coupling on your fuel inlet. Is this sized for fueling at commercial docks? What size coupling are you using? I like the guard around the inlet and vents to collect any spilled fuel - slick idea given the fines for even a small spill.
ReplyDeleteErzulie,
ReplyDeleteThanks. Mare Island definitely has a good boat building vibe. Also being right next to work doesn't hurt. There is no way I could pull this off if I had to travel elsewhere to work on the build. What did you do at Mare island?
The fuel inlet is 2" pipe with a two inch cam lock fitting. This drops to a fill manifold in the engine room that has 1.5" drops to all the tanks. I have lots of venting on the tanks (two 1" vents per tank), but I would still have to watch things very carefully if I direct coupled it to a fuel fill line. This is how we fill the ferries and it builds up a lot of pressure in the vent lines. The main reason that I used the camlock is that it seals the fill pipe quickly and securely and you don't have threads to get banged up or seized. I'm going to use these on the water fills as well.
Thanks for following!
Peter
Peter, I worked for the Forest Service in computers and data communications, and for a few months I worked on a project at our office next to the golf course on the Island, either staying in Vallejo or commuting from Fresno.
ReplyDeleteI'll definitely keep following your project now that I've discovered it. If you don't mind my asking, how much are you being charged for the building site? The reason I'm asking is I know someone in the Bay Area that's looking for a site to build a Swain 36. He's in the process of weighing all the costs before he proceeds.
Thanks for the info, Norm
Send me an email and I'll fill you in on my experience building out here on MI.
DeletePeterjbelden at gmail dot com.